Getting Started
What is a Virtual Private Server?
A VPS (Virtual Private Server) is an environment that runs an operating system on hardware shared with other VPSs. This is accomplished by "virtualizing" each server, which is essentially running each VPS in it's own digital "box" separate from the others. This also prevents each VPS from directly changing the other VPSs on the same machine, putting the word "private" in VPS.
The VPSs we provide run Linux, which is a relatively bare-bones operating system intended to run server applications for long periods of time and is the literal backbone of the internet as we know it. As a result you will have to install most of the software you intend you run after your VPS is deployed. You'll be primarily doing this via command line through a protocol known as SSH, or Secure Shell Protocol (opens in a new tab), which allows you to use an application, such as Putty (opens in a new tab), to open the Command Line Interface of a Linux machine remotely.
We'll be going over the details of how we handle the VPS services we provide, some places to start if you aren't familiar with Linux, and how to use the Panel we provide, to control and monitor your VPS Service.
Building your Virtual Server
Before you can use your brand-new VPS you will need to build your virtualised environment and configure the name, hostname (optional), timezone, operating system and network.
Once you have logged into the Nordblade control panel (opens in a new tab), locate the following:
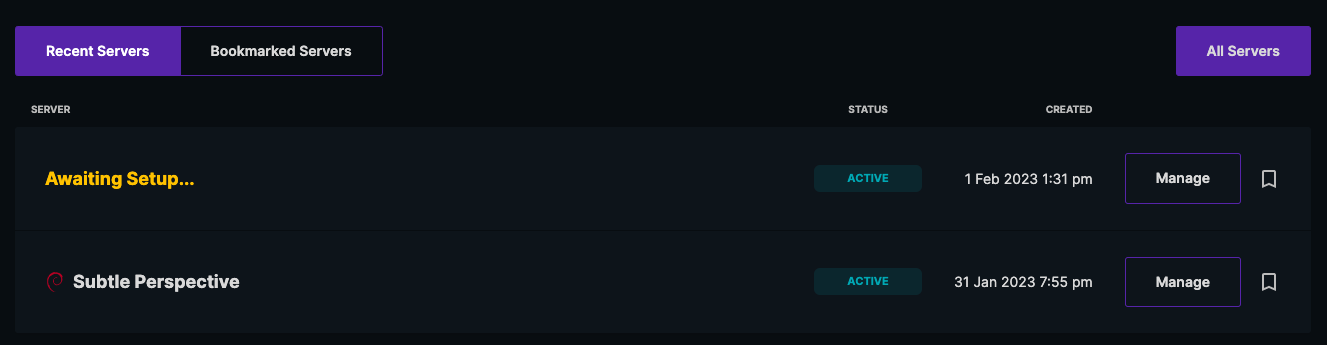
Then click Manage. This will bring you to the server setup where you can configure all the aforementioned details.
Most importantly, you will need to choose your operating system. We offer a large large library which you can choose from (including Windows). If you think we missed something, feel free to let us know here (opens in a new tab).
Alternatively you may upload your own OS via ISO media by clicking the “Self Install” button. VNC will automatically be enabled for you.
You may also opt to use an SSH key rather than a password for authentication, this will be configured under the root user once the operating system is installed. Learn more here.
Advanced Options
If you wish to configure the advanced options click the “Advanced Options” button at the bottom of the page:
You then have the ability to enable Virtual Network Computing (VNC), this isn’t a necessity when installing the server and it can be enabled at a later date from within the panel.
We also offer the option to change your default IPv4 Public DNS Resolvers. A server requires two DNS resolvers. You may swap the system defaults for a preferred set of public resolvers.
Building
You can then build your fresh-off-the-press Virtual Private Server with the following button:

If you haven’t created any SSH keys, you will be presented with a warning, although it is recommended to use SSH keys, the VM will run fine without.
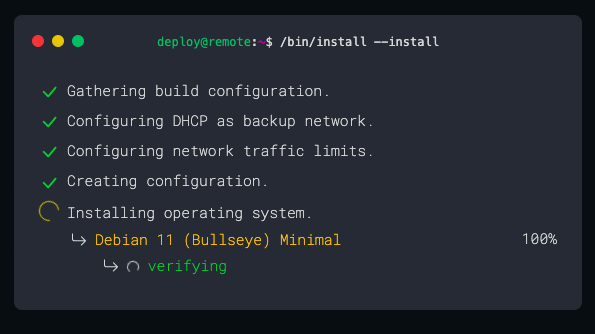
You will then be redirected to walking you through the building of the VM, don’t click anything to interrupt the installation however you may change your tab.
Once this has finished installing, you will gain access to the full control panel (feel free to have a look around) and a receive an email with your login details such as the following:
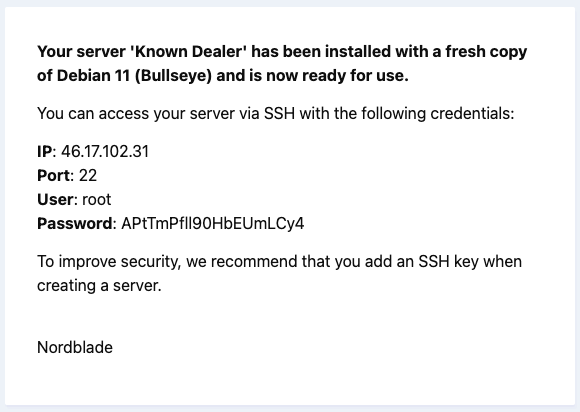
Congratulations! You now have a Virtual Private Server on your desired operating system ready for anything you throw at it.